

How I organized all my photographs
using Windows Photo Gallery
Though I was born in the age of film cameras, over the years I have accumulated digital photographs that occupy close to 1TB of hard disk space. The volume keeps increasing through multiple cameras and mobile devices at home and I also hope to scan and digitize many of my pre-digital photographs. Since cloud storage space has become limited or pay-per-use, I found external hard drives to be a very reasonable alternative. Though I have used Windows Photo Gallery, you may find similar features in other software to address some of the challenges.
Given below are a few attributes that you may use to search, group or sort your photographs:
- Date taken — could be a specific year, month or a date range
- People — face recognition capabilities make it even better
- Location — specific location, city, country, region
- Caption — title for the specific photograph
- Descriptive Tag — events such as birthdays, festivals, cultural, sports
- Camera — maker and model
- File or Folder name
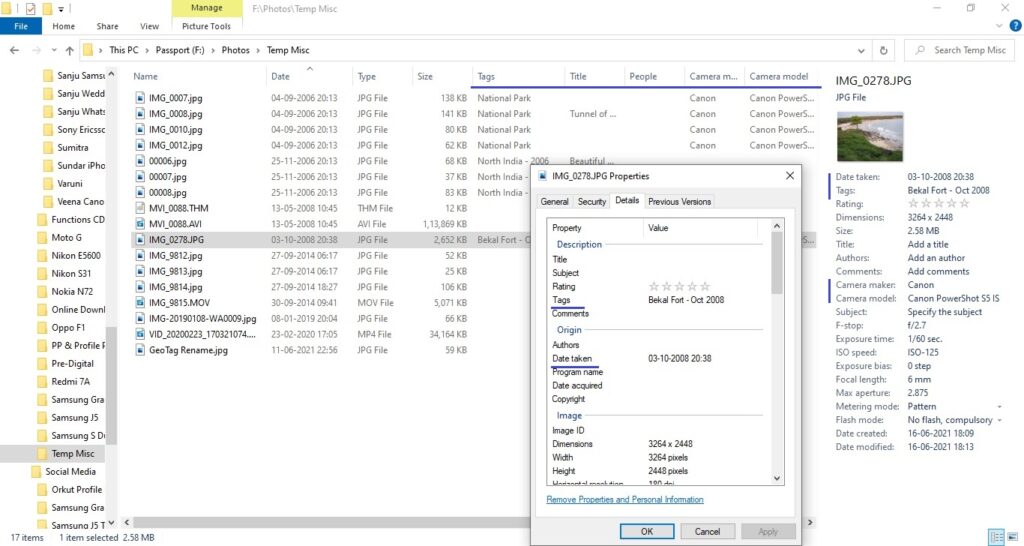
File formats such as .JPG, .TIF, .WAV, .PNG follow the EXIF standard (Exchangeable Image File). Some attributes may require an EXIF viewer software. However, most of what we need is available directly in Windows Explorer itself. Have a look at the pic below. You may have to right-click on the column section and enable these. You can also view them by enabling the Details pane on the right, or by doing a right-click Properties and viewing the Details tab
At some point in my photo organizing journey, I discovered Windows Photo Gallery that had all these view options and many more. Photo Gallery (also known as Windows Live Photo Gallery) is a photo editor and image organizer program that was a part of Microsoft’s Windows Essentials software suite. This has hence been discontinued, but you can still get a copy of this software and it works very well.
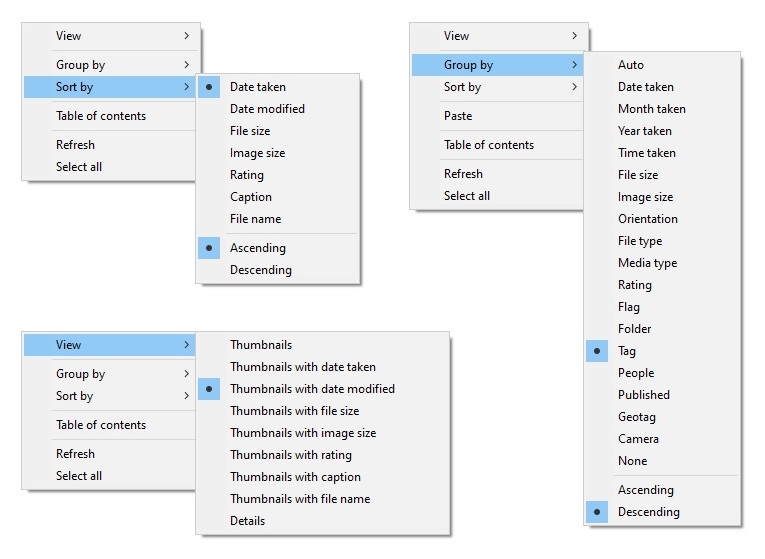
Given below is a snapshot of the view options available in Photo Gallery.

If you right-click in the centre section, you get multiple options for Sorting, Grouping and Details to View
Date and Camera details are always included in the photographs from digital cameras and smartphones. Some devices have GPS features to capture Location information too. People tags could work with image recognition software. But Descriptive Tags are something that you may have to work on your own.
But note that most of these tags are lost if:
1. The pic was shared with you over social media
2. A physical photograph is scanned
3. The camera had an incorrect date setting or GPS turned off
I was able to recognize many dates based on specific event days such as a birthday, festival or trip. In case of an incorrect date setting on the camera, the file name gave me at least the sequence. Sometimes even the date on the corresponding thumb files (.THM) helped. I realized that the .THM is also an image, and you can rename the extension and view as a picture.
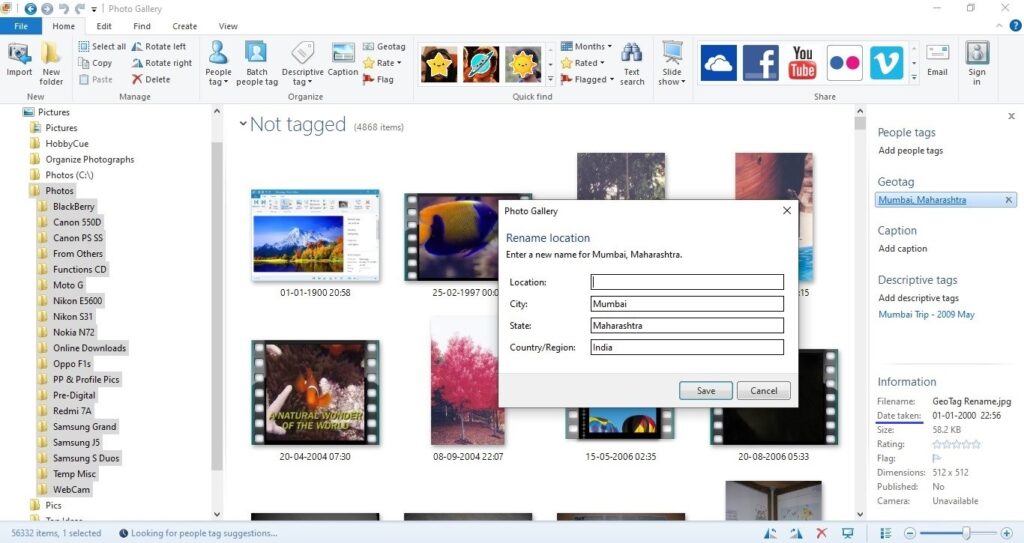
I was able to organize my old photographs much better by editing the Date Taken attribute. In Photo Gallery, you’ll find it at the bottom section of the detailed pane on the right (refer pic below). I was also able to find a hack to manually enter the Location or Geotag. Take a sample photograph that already has the location information. Right-click on the tag, select Rename, and enter the new location you want to include (see pic below). Once this is done, the new location is included as part of the repository and available for use in other pictures as well.
Here are some advantages and limitations
- The tags are embedded in the image files. So you can easily move them across devices and still categorize and view in the same way.
- Real time image recognition does not work in Photo Gallery. For example, in Google Photos, you can search for “mountain” and get all photos containing a mountain or hill. This includes some artificial intelligence capabilities.
- Photo Gallery does not recognize people with a face mask 🙂 I guess this challenge exists in all software.
I found that it is best to have separate folder for each camera or smartphone so that the file names are unique and the sequence is intact. In some scenarios I had to use a separate duplicate finder software.
Given below are some references for further reading:
- How to Use Windows Photo Gallery: 11 Steps (with Pictures)
- Tagging Pictures in Windows 8.1 Photo Gallery – dummies
- Accessing Windows Photo Gallery Metadata using Exiftool
- How to Add Geocode Lat/Lon Information to your Photos
- Microsoft Photo Gallery Geotag ‘No connection’ workaround
- Moving away from Windows Photo Gallery Geotags
- 5 Easy Ways to Change Photo Date
- Viewing Camera RAW Thumbnails in Windows Explorer